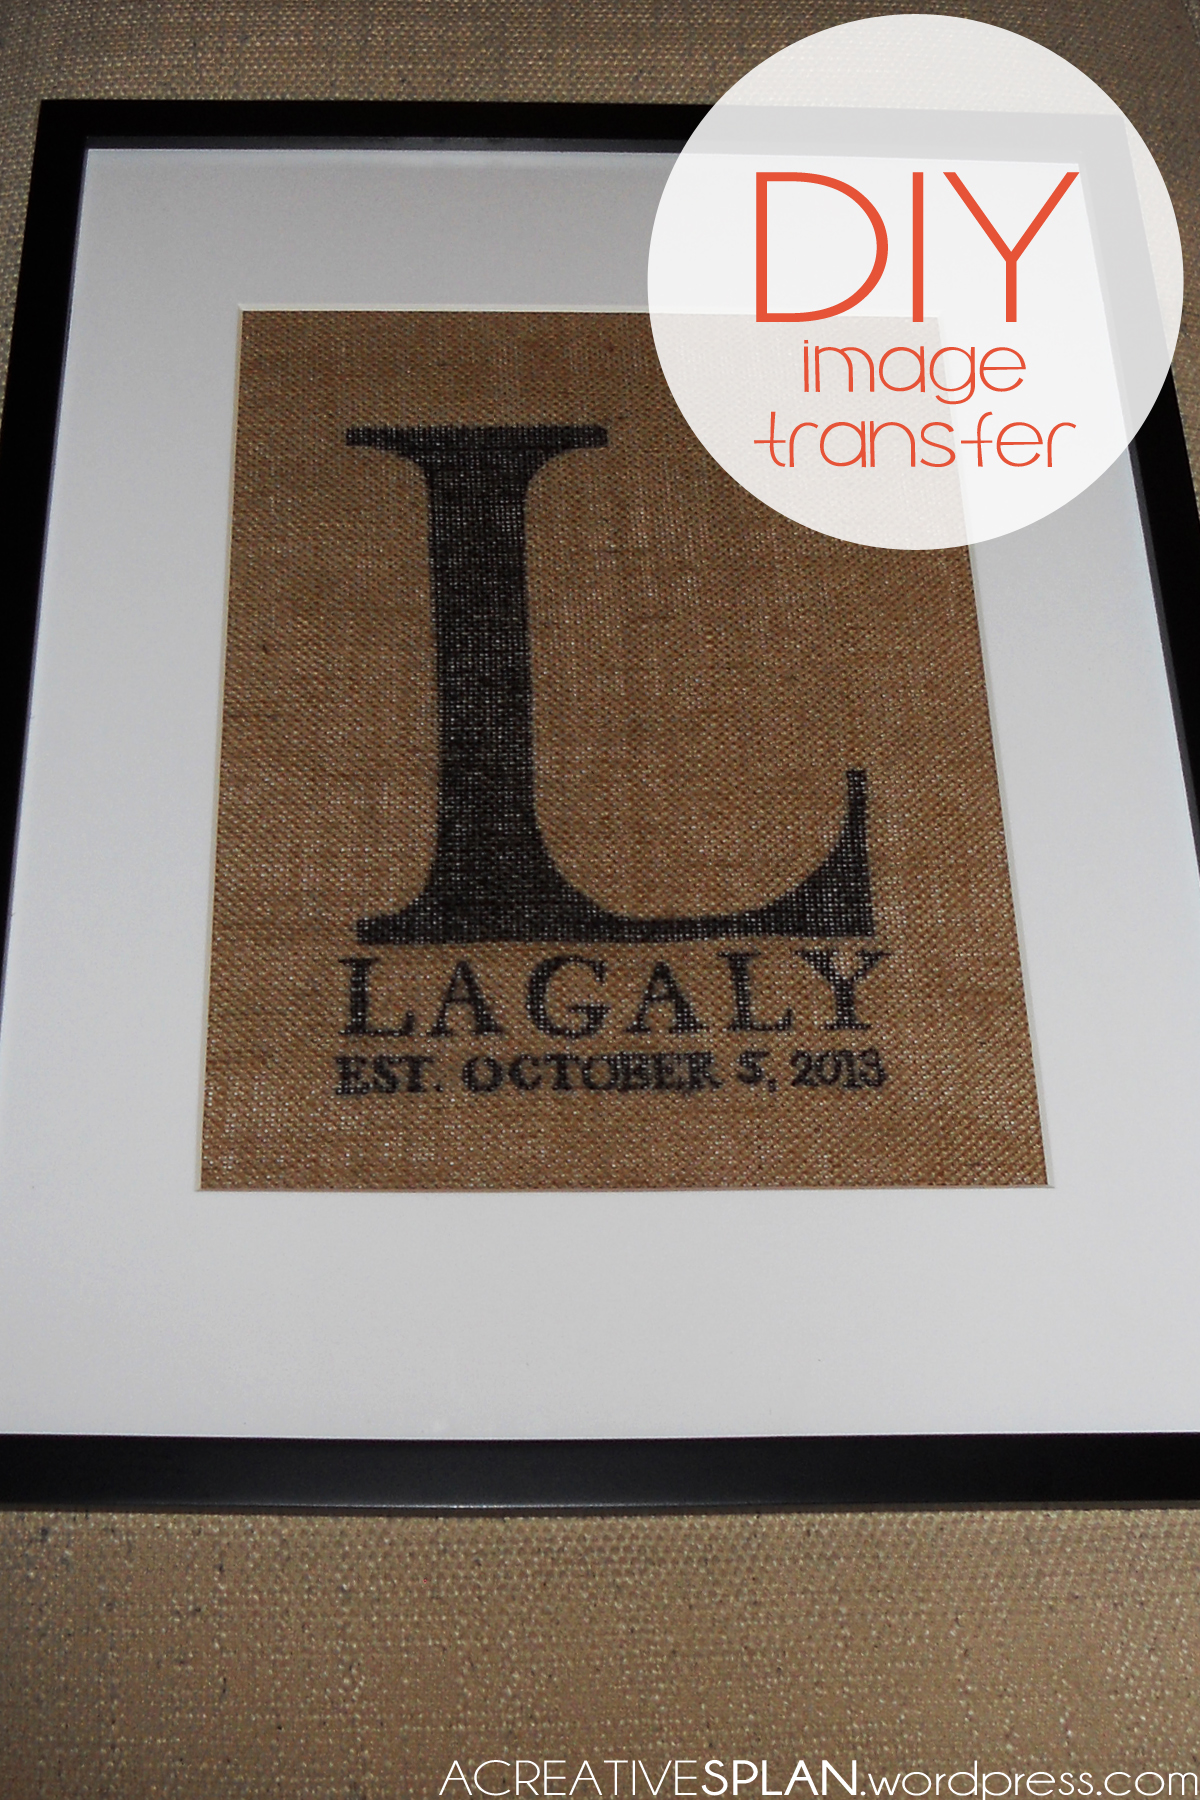
Sorry for my small absence recently! I’m about to overload you all on some posts. I’ve been hiding many of my diys from the bride, didn’t want her to see the decorations and gifts before the big day. Above is the initial frame that we placed on the gift table. I used an image transferring technique to create this custom wedding gift for my dear friend.
Sometimes you have a great idea and can’t seem to find the solution to create it. I’ve been trying to figure out imaging transferring and the best way to do it. I’ve tried the wax paper and freezer paper solution, didn’t work. I ended up having to sketch out and color in the entire design. Don’t get me wrong it turned out fine, but it would’ve been so much easier if I had known about this! Finally I found the right route when I created this framed initial canvas. Try it on a pillow, framed fabric, or place mat!
Here’s what you need:
The material you’ll be transferring onto (A lighter fabric is easiest. I chose burlap, since the fabric is darker you’ll have to work a little harder on the tail end of this diy.)
Colorless Blender (I had these markers from studio, if your an ID like me I’m sure you have a stash somewhere. If not, they’re available at craft stores. Look for Chartpak or Prismacolor.)
Print of your text or image (A simple print with regular ink on regular paper.)
A vented area (These markers STINK, so sit near a window or fan. Or be prepared to have a mondo headache.)
Sharpies (Depending on the look you’re wanting to achieve you may not need these. I wanted the image dark, so I filled in the transfer a bit darker. The original transfer will look a bit more vintage.)
Tape (You may need this to hold your design in place.)
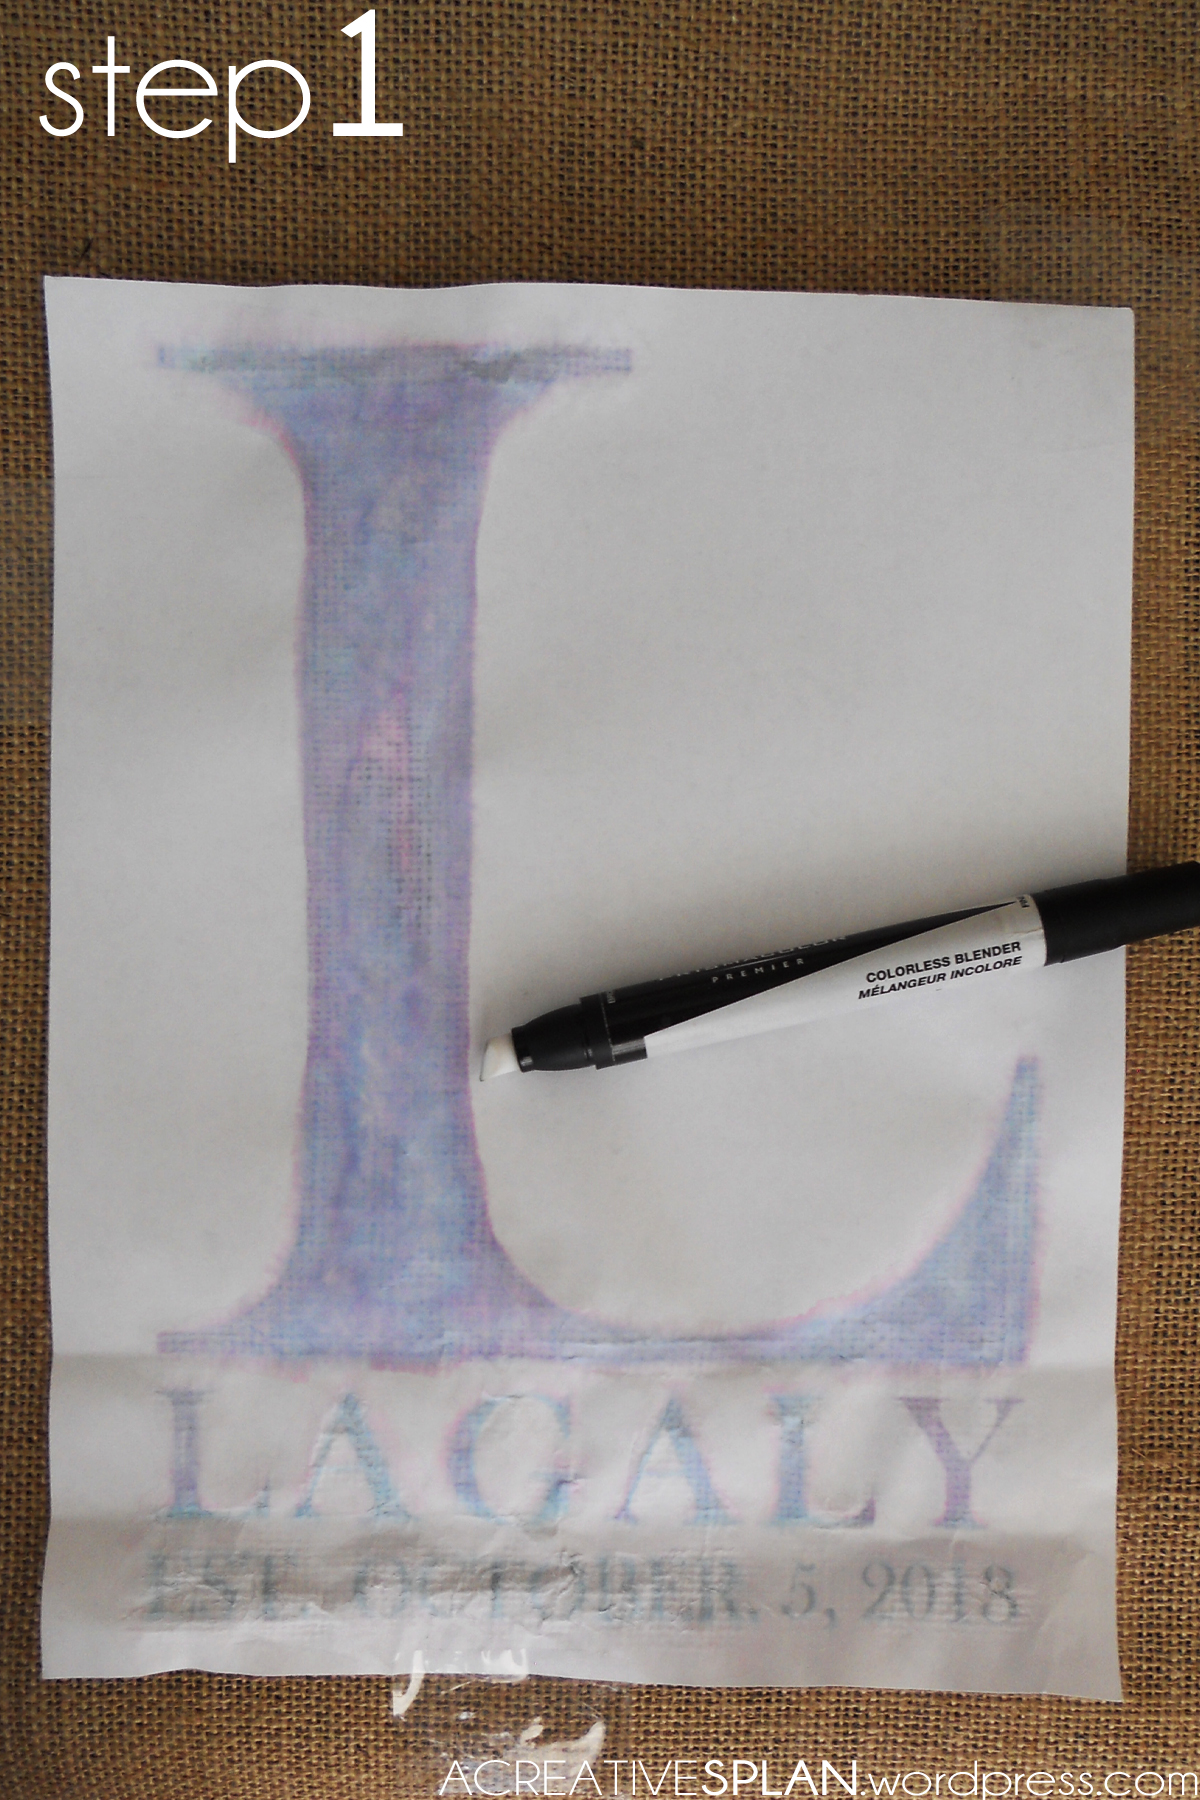
Step 1
Take your print and position it onto your transfer material. Tape the print down so it doesn’t shift as you transfer your image. Now comes the magical marker. Literally color over your print where ink is present. You’ll want to completely saturate these places. Your image is transferring. Periodically check your transfer material to see if there are any parts of the image not transferring.
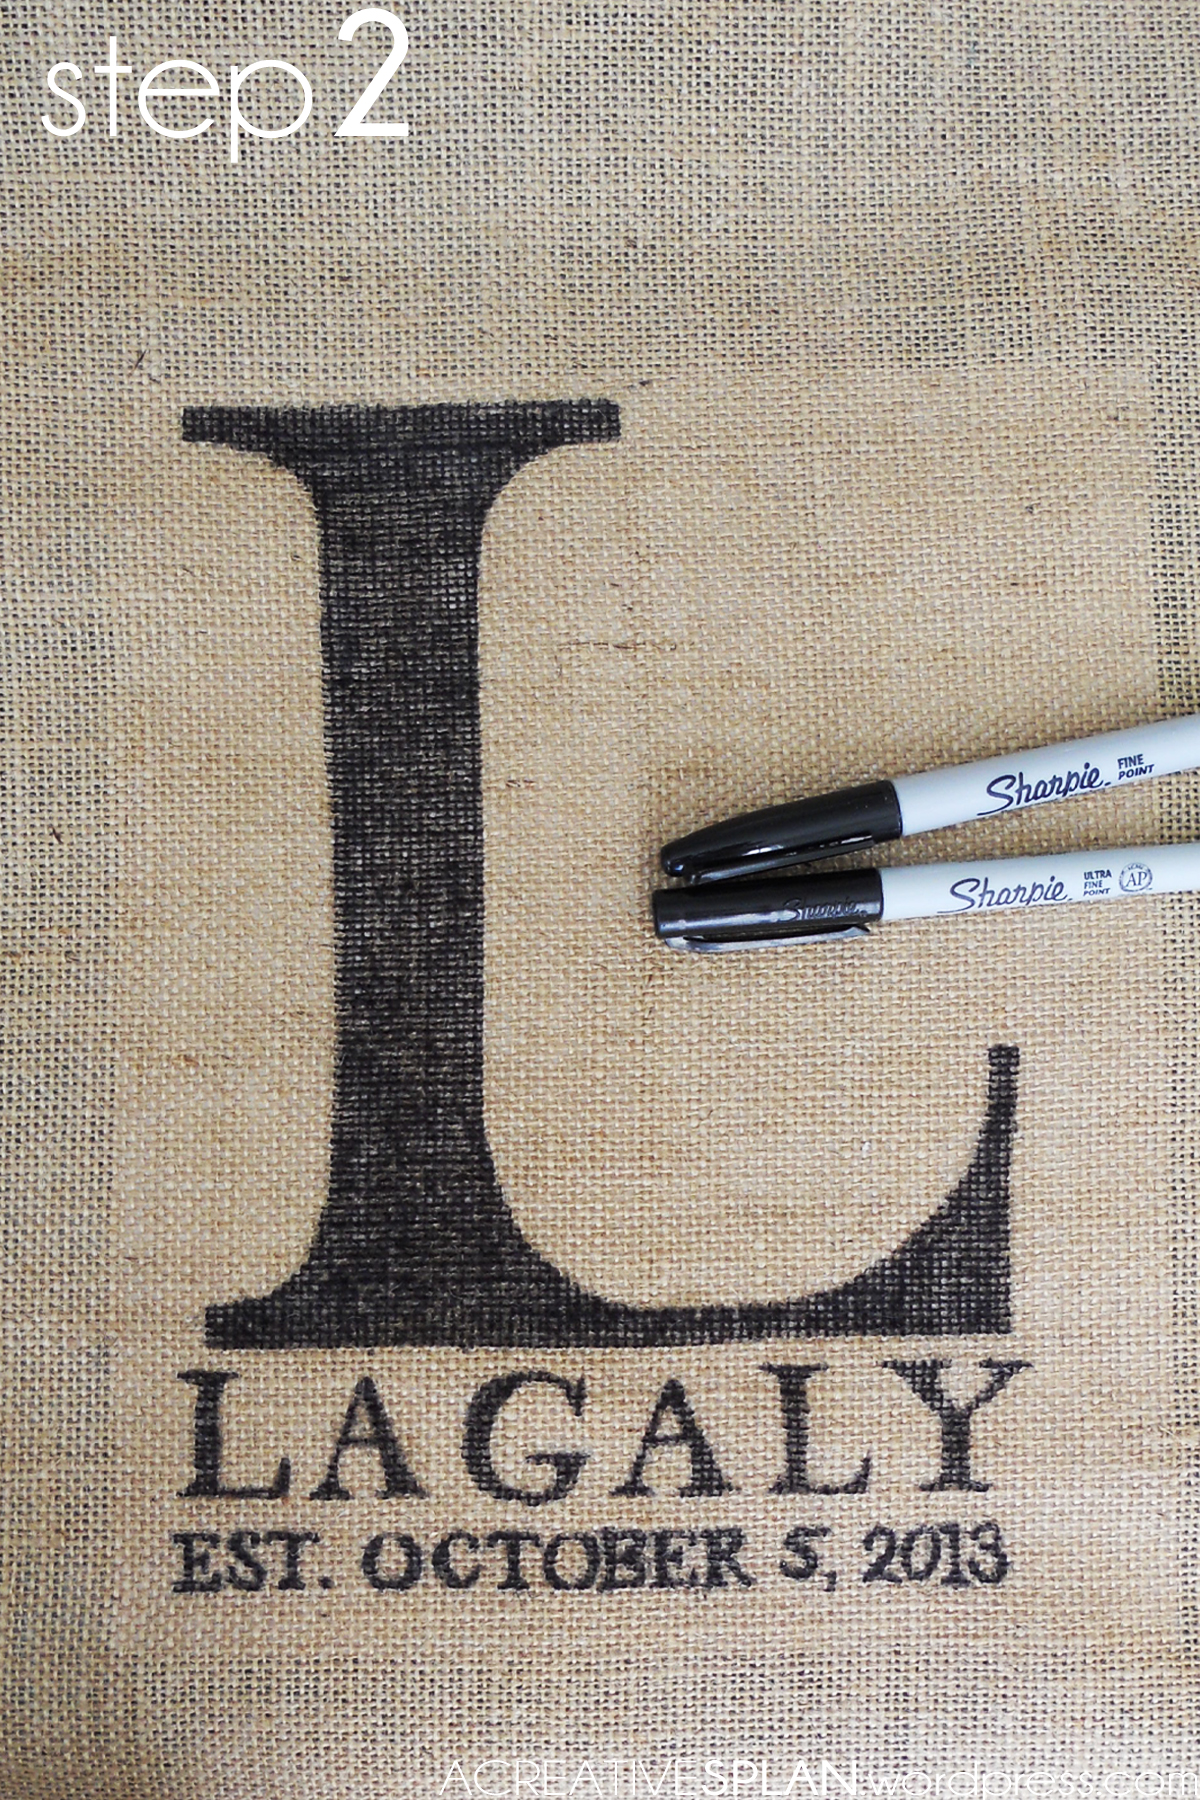
Step 2
Are you happy with your transfer? It all depends on what look you’re wanting to achieve. I didn’t want a spotty vintage transfer for this project. So I filled in the image with sharpie, in this case the image transfer helped give an outline.
 If you’ve been thinking of doing a project like this, I would definitely recommend the colorless blender solution. It’s the only technique that I’ve found works, I had to share it!
